


Heat Press 101: Setup & Anatomy Of A Heat Press
Browse Video Categories
Transfer Application | Artwork & Apparel | Easy View Tutorials | Webinars | Ordering Tips | Business | Heat Presses
Hey guys, Dave here with Transfer Express and today we are diving into the anatomy of a heat press. So if you've never used one before, this is the video for you.
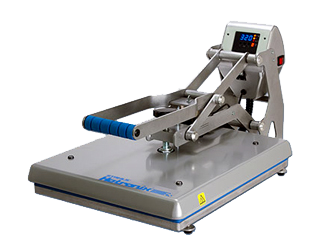
We are going to be going through our Hotronix Auto Clam 16” x 20” heat press behind me here. But the same essentials apply regardless of what model, manufacturer, or make you have of a heat press.
Are you ready? Let's get started!
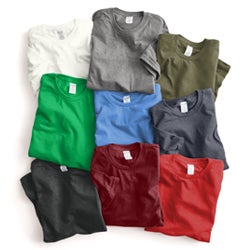
One of the things that makes working with Transfer Express so appealing to garment decorators is that this machine right here is the only machine you need to decorate virtually any fabric that will sit flat. We're talking t-shirts, hoodies, sweatshirts, blankets, tote bags, a ton of stuff so it's a no-brainer when you consider the fact that this press costs eighteen hundred dollars while the equipment to screen print on your own costs thousands to tens of thousands of dollars.
Sure you could go buy a Speed Ball kit at Michael's or Joanne Fabrics, but you're not going to be getting the retail ready quality that this heat press and screen printed transfers could give you.
This machine literally becomes the cornerstone of any garment decorators business. So let's
talk about its anatomy so that we could better understand it.
First, the heat comes from the top of the press called the upper platen. Now, the heating coil in this is woven back and forth in this upper platen like a snake, ensuring that the full surface is evenly heated. Cheap overseas-made presses will instead put an x or just a simple z-shape in the heating coil, saving them money on construction but creating an unevenly heating surface when they press a transfer. That's called cold spots.
The press in our video here is the 16 by 20 Hotronix Auto Clam and it retails for about 1800 bucks.
It's worth noting that this press does come in two different sizes other than the full size one that we have here. Customers should keep in mind that less space means less money but it also means less versatility.
Next, is the lower platen. This is where you set your actual garment. You'll see that the pad on top is sort of a squishy silicone foam material, and over top of that we have what we call a Quick Slip Pad Protector, which not only keeps your lower platen clean but it makes it super easy to slide a t-shirt on and off.
The lower platen is not generally heated unless you purchase an extra accessory for that purpose alone. But that's not needed for products here at Transfer Express.
Before we move on to the next piece, let's take a moment to acknowledge how cool this is. Our lower platen can be easily removed and interchanged with a wide variety of different platen shapes and sizes to make oddly shaped items even easier to press. We're talking like can koozies, hat bills, the shirt sleeves, legs and even the inside tag of those t-shirts.
Up top on the press, we do have a pressure adjustment knob. This is found on almost any manual press, meaning a press not hooked up to an air compressor. Those are the automatic ones. Now for air machines, their pressure is perfectly regulated by the air compressor.
But for a normal machine just like this one, we have to tighten and loosen the pressure as needed by turning the knob on the top of the press. Typically, you'll find clockwise motion makes the pressure firmer while counterclockwise loosens it. Righty tighty, lefty loosey – same concept.
Here at the top, we have the control board. This is where you will set the time and temperature settings for the press. Notice that the red lights, here, change as we hit the mode button, allowing us to set the temperature as well as two time settings on this press.
Most presses only have one time setting.
One time for this is for pre-pressing and one is for pressing the actual transfer, or if you're doing a two-step transfer like our foil transfers, you'll put the adhesive down in one step and set the second step to apply the foil.
We are going to set this press up for Goof Proof. We'll go ahead and set it to 365 degrees, three to five seconds for our pre-press.
We'll go with three seconds here and four to six seconds for our application, according to the instructions, so we could set this one right in the middle at five seconds.
As we go to press the shirt, you'll see that I'm able to open it up and fit the shirt all the way over the platen. This way, only one layer of the garment is on the press at a time. We call this threading the platen. This is made possible by the extra piece of equipment here underneath our press called the Heat Press Caddie Stand. It's on wheels and it gives you some mobility with your press, but it does take up a little bit more room than if you were just setting this on a counter.
Luckily, we also have the Counter Caddie Stand, which is going to lift it up off the counter and give you that full threadability on your press. You could also get some nice shelves for the press as well, called our Caddie Shelves. They attach very easily right to the Caddie Stand.
As I press this shirt, there are three elements all coming together to make this transfer come off the sheet of paper and stick to the shirt itself. We call these three things the heat press trinity – they’re time, temperature and pressure.
The heat causes the adhesive to activate and the ink to liquefy. The pressure makes the ink melt directly into the fibers of the garment where it'll cure and permanently adhere. Last, but not least, is time because different adhesives take different amounts of time to do what they need to do.
Too much or too little of any of these three things can cause a transfer not to press correctly.
And that's it. I hope that you guys learned everything you can about a heat press here today. While you may not have this exact model of the Hotronix Auto Clamshell press, the same principles will apply to almost any heat press out on the market.
Just check the instructions that came with your press to see exactly how you set your time, temperature and pressure.
But until next time, I'm Dave. Happy pressing!